July 17, 2012

Kara Kadalai (Spicy Peanut snack)

   Peanuts or Monkey nuts have always been a favorite food of mine, albeit ever since I began counting the calories, they are not as dear as before! 'Kara Kadalai' was always a great snack to have, especially during the summer vacations when I loved getting lost, reading my favorite Enid Blyton books. Just loved digging into the kadalai and sipping cold 'Rasna', the most popular flavored drink of those times. Kara Kadalai derives its name from 'Karam', which means 'hot and spicy' in Tamil and 'Kadalai,' meaning peanuts. So it is basically 'Hot and spicy peanuts'. You can find these in most savory shops in south India. I have tasted the shop made kara kadalai......they were deep fried and almost always dark red in color, maybe due to the red chilly flakes added to make them spicy. But they were never anywhere close to the kara kadalai my mom made, either in taste nor appearance. They also seemed to lack the besan coating of the home made kadalai. The measurements given below are based more on judgement rather than accuracy, since I sometimes increase or decrease the quantity of all the ingredients mentioned. To start with, you could use about 1 teacup of raw peanuts and try out this recipe, altering the quantity of all the ingredients. Since my mother used her experience in making this snack, her proportions always went by 'a handful'. This recipe is from her favorite old, handwritten recipe book.This is one easy snack to make, so do try it :)


Kara Kadalai


Ingredients:

Raw Peanuts - 1/4 or 1/2 kgs (use whole peanuts with skin)
Besan (Gramflour/ Chickpea flour)) - 1/4 to 1/2 cup
Chilli powder - 1 tbsps (add more if you like it very spicy)
Salt - 1 tsp or as per taste
Water - 1/4 cup
Oil - 1 cup

Method:

1) Place the raw peanuts in a large bowl and sprinkle just enough water so as to just coat all the nuts with water. Take care not to soak the nuts, else you will get lumps of peanuts while adding besan. Kara kadalai is supposed to have individual peanuts coated in gramflour. Don't worry if the 1/4 cup water mentioned above is not used up entirely. The peanuts should have just enough water, so the besan sticks to them properly. An easy way to do this would be to toss the nuts around in the bowl :)
2) Now add a handful of besan, chilli powder and salt to the peanuts and toss them around till they are well coated in the besan. Taste the raw peanuts to check for salt and chilli powder. Add more besan, chilli and salt, in case you feel it is less. Sprinkle some more water on the peanuts if you feel it is too dry and the besan is not sticking to it. The reason I recommend using a handful of besan at a time, rather than just adding 1/4 or 1/2 cup to the peanuts is to ensure that you don't over coat the nuts in the gramflour. This way you can adjust the flavor. Want to taste more peanuts, add less gramflour. Want a spicy flavor, add more gramflour, salt and chilli powder.


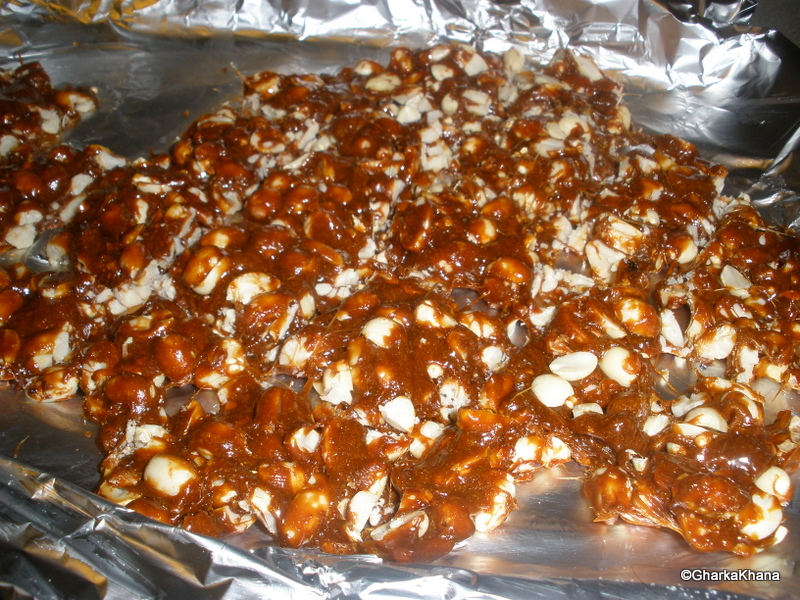
Raw peanuts coated with Gramflour, Chilli powder and Salt
3) Heat the 1 cup oil in a kadai or heavy bottomed saucepan on high flame. Once the oil is ready, test it by adding one peanut. If it sizzles, you should lower the flame and add a handful of nuts to the oil. Fry the nuts on very low flame till it appears light brown in color, taking care to stir them continuously, lest they burn.
4) Place the fried nuts on a paper towel and put them in an airtight container once they are cooled. They should  remain crunchy for upto two weeks.

Note:
  The peanuts will appear to taste soggy when you take them out of the oil. But they will become crunchy once they cool down.
                                                      

July 12, 2012

Poondu Kulumbhu (Garlic Curry)

   Garlic or Poondu as it is known in South India, is a very strong smelling, pungent root. Peeling garlic in the kitchen is despised by most women, thanks to the smell that lingers in the fingers. But everyone will agree when it comes to the health benefits of the garlic clove, that it is one ingredient they would love to include in all their cooking. Garlic pearls are known to purify blood, improve blood circulation and serve as an anti-oxidant, promoting the well being of the heart and immune system. Mom used to use garlic in all her dishes in one form or the other. Sometimes it was garlic paste, garlic powder, chopped garlic, whole garlic..... the garlic pod was a staple in our kitchen and together with ginger, it was essential to create many a gastronomic delight ! Mom used to make poondu kulumbhu a lot, especially in garlic season. This was my Dad's favorite and together with plain dal, he used to have a feast. I never liked poondu kulumbhu in my younger years, but developed a taste for this once I learned to cook. Like my dad, now I love the combo of having hot rice with  plain dal, a dollop of ghee on top and the poondu kulumbhu as an accompaniment or mixed with the dal rice. Absolutely delightful !


Poondu Kulumbhu (Garlic Curry)

Ingredients:

Garlic cloves or poondu - 1 and 1/2 handfuls
Onion - 1 and 1/2 (finely chopped)
Tamarind - a small pellet (1/4 size of a lemon)
Tomatoes - 2 (pureed or finely chopped)
Fenugreek seeds (methi seeds) - 1/4 tsp
Sambar powder - 1 1/2 to 2 tsps
Grated fresh coconut - this is optional
Salt - to taste
Cooking Oil - 2 tbsps (use sesame/ gingelly oil as it is tastier)
Mustard - 1/2  tsp
Urad dal - 1/2 tsp
Curry leaves - 3

Method:

1) Soak the tamarind in water for 20 minutes and extract juice by squeezing the pulp and straining. You can increase the quantity of tamarind in case you prefer a very sour flavor (pulipu flavor). You can also microwave the soaked tamarind in water for about 1 minute, cool it and extract the juice.
2) Heat some oil in a kadai or skillet. When oil is hot, add mustard seeds, urad dal, fenugreek seeds and curry leaves to season the oil. Take care not to add too much of fenugreek seeds, else the curry will turn bitter. These seeds are only added to enhance the flavor of the kulumbhu. Now add chopped onions, a little salt and stir fry till onions are slightly translucent.
3) Add the peeled garlic cloves. An easy way to peel garlic would be to microwave the garlic with the skin for about 30 seconds. Or else roast the garlic with the skin in a hot kadai/ saucepan for about a minute. The skin will loosen up and the garlic will become soft, making it easier to remove the skin. An advantage of this is the fact that the garlic cloves will fry faster and absorb the liquid curry better, making the kulumbhu tastier. If peeling garlic is not for you, then use the peeled garlic readily available in the freezer section in the Indian store or Costco. I am sure you get peeled garlic in India too, only I don't know the store names.
4) Now add the pureed tomatoes, the tamarind extract and the sambar powder to the fried onions and garlic cloves. Fry them for few minutes till the tomatoes are cooked. You can add chopped tomatoes too, but I feel adding ground/ pureed tomatoes increases the quantity of the curry and the garlic cloves blend well into the curry. You may need to add red chilli powder in case your sambar powder does not contain chilli powder in it. Since I use home made sambar powder already containing chilli powder in it, I have not added the same here. Add salt to taste. Add only required quantity of water to the mixture, making sure you do not thin down the consistency. This curry is usually an accompaniment to rice and dal, so should have a slightly thicker consistency. It can be eaten with rice as such too, not necessarily as an accompaniment. Watering down the curry would essentially ruin the taste. 
5) Bring the curry to a rolling boil till the raw smell of the sambar powder is all gone. You can add grated coconut before the curry starts to boil, in case you wish to tone down the sourness of the kulumbhu. I have had this kulumbhu with and without the coconut. I like the one without the coconut better as you get the actual sour flavor of the curry and the pungent but yummy taste of the garlic cloves.

Note:

  Try to use gingelly oil (sesame oil ) while doing seasoning as it enhances the flavor of the kulumbhu. You can also use regular canola, sunflower or vegetable oil. My mom says you should try grinding the tomatoes with 1/4 onion. Add a small pellet of jaggery to the kulumbhu before bringing it to a boil. This way you will sample a delightful combination of sweet, sour and spicy kulumbhu.

Serving size: Will serve 2 people for a single meal.


June 29, 2012

Banana Walnut Cake

    I got my first taste of the banana walnut muffin in the US. I do vaguely remember seeing banana recipes in my mother's old trusted recipe books, maybe my mom did try out this cake long time ago, but I have no memories of that.All I remember about bananas being used as an ingredient in a sweet was the 'unniappam', where ripe bananas were smashed, mixed in the maida or rice flour batter along with sugar, cardamom and deep fried. Those were yummy in their own way, but nothing beats the combo of walnuts with bananas. Truly heavenly! Got ripe bananas and don't feel like eating them...well then, just bake this cake. I tried baking this cake with variations in the quantity of flour and it came out great on all the occasions.


Banana Walnut Cake


Ingredients:
All purpose flour or maida - 2 cups
Sugar - 1/2 cup
Brown sugar - 1/2 cup(optional, but highly recommended for best results!You can also use just 1 cup                                     sugar, if you don't have brown sugar)
Ripe bananas - 2 (pureed)
Baking soda - 1 tsp
Salt - a pinch
Eggs - 2
Butter - 1/2 cup (use 1 stick of unsalted butter)
Milk - 3/4 cup
Walnuts - 1/2 cup (broken and roasted)
Cinnamon powder - 1/2 tsp or more (if you like a cinnamon flavored cake)
Vanilla essence - 1 tsp
1 round 9 inch cake tin or a 8.5 inch square tin

Method :
     Prepare the cake tin first by smearing a little butter or cooking spray and dusting with flour.Set aside. Preheat oven to 350 degrees.

1) Firstly, bring the butter and eggs to room temperature. You can microwave the butter for about 10 seconds till it is just soft, taking care that it does not become liquid. Immerse cold eggs in luke warm water for a while and it should fasten the process.

Butter and eggs ready for use
2) Sift together all the dry ingredients (flour, soda, salt and cinnamon) in a large bowl using a sifter. Sifting ensures that all the dry ingredients are mixed well without any lumps.

Sifting together flour, soda, salt and cinnamon
3) Cream the butter using a hand or stand mixer at low speed in another large bowl. You will find it easier to cream butter kept at room temperature.Slowly increase the speed till the butter turns a light yellow color, taking care to scrape the sides of the bowl. By scraping the sides, you make sure that all the butter is properly beaten.

Creaming butter with a hand mixer
4) Slowly add sugar to the butter and continue beating the mixture till you get a coarse sand like texture. It is best to add the sugar in parts, so as to incorporate maximum air. Now add the two eggs and vanilla essence.Beat again on low speed. You can add the eggs directly or first mix them in a bowl and then add them.
1/2 cup Sugar and 1/2 cup brown sugar mixed together
Creaming butter with sugar
Eggs and vanilla added to the creamed butter
Fluffy texture after beating eggs and vanilla with creamed butter
5) By now you should have a fluffy light colored mixture. To this add the banana puree and beat for a few seconds on high.The mixture will appear curdled. You can even try to mash the bananas with a fork and add the same. Personally, I prefer the smooth texture of the pureed bananas to the mashed one.

Bananas in mixer jar ready for pureeing
Pureed bananas
Adding banana puree to creamed mixture
Creamed mixture after adding banana puree
6) Add the dry ingredients slowly to this curdled mixture alternating with the milk.Use a spatula to gently cut and fold the ingredients into the wet mixture.You can use cold milk for this purpose.Milk is added to give texture to the cake and to prevent it from being too dry after it is baked.Use up all the flour mixture and milk to get a smooth batter.

Measuring 3/4 cup milk
Cut and fold dry ingredients with creamed mixture, alternating with milk
7) Now add the roasted walnuts and give it just one mix with the spatula till the nuts blend in. Microwave the walnuts for about 20 seconds, if roasted ones are unavailable.Adding the nuts in the end will ensure that they don't sink to the bottom and are evenly distributed in the cake.Add either 1/2 cup or 1 cup depending on how 'nutty' you want your cake to be.I usually don't add more than 1/3 cup as I don't prefer a very nut filled cake, even though I love walnuts.

Roasted walnuts dusted with wee bit of flour
Mixing in the walnuts
8) Pour the batter into the prepared pan and bake at 350 degrees for 30-35 minutes.Check with a toothpick or cake tester for doneness, both on the top and sides of the cake. Bake for 5 more minutes in case you feel it is not done. Remove from the oven and keep in the pan for 10 minutes before transferring it to a cooling rack.Cool completely before cutting and storing the cake in an airtight container.

Cake batter in a 8.5 inch square pan
Ta Da!!  Banana Walnut Cake :))
Variation:
Try these measurements if you want a denser, more rich cake with a buttery taste.
Flour- 1 and 1/4 cup, Sugar - 3/4 cup + 3 tsps, Baking soda - 1 tsp, Salt - a pinch, Eggs- 2, Bananas - 2(pureed),  Milk- 1/2 cup, Butter - 1/2 cup or 1 stick, Vanilla essence - 1 tsp.

Follow the same instructions as given above and bake at 350 degrees for 30 - 35 minutes in a 9 inch round pan. Test for doneness. Cool completely before cutting and storing the cake in an airtight container.

Note:  
1) If both recipes are made in a 9 inch round pan, expect it to rise in the center and don't worry if the cake cracks a little on the top. The first recipe is also perfect for the square pan. The cake rises only slightly, but mostly evenly in this pan. In case the cake is not cooked well enough in the center after 35 minutes, reduce the heat to 200 degrees and leave the cake in the oven for 5- 7 minutes till the center cooks well enough.
2) The first recipe is very light and fluffy and absolutely yum! The variation recipe I have mentioned above, I used it when I first started out baking cakes. I recently tried baking this cake in a 9 by 13 inch pan with 3 large and 1 medium ripe banana. I had 2 and 1/2 cups of the puree and used it all with a cup of white sugar. I ended up with a slightly dense brownie like cake. It was mildly sweet and good, but I am still wondering why I didn't get a fluffy texture. Have to investigate ;) Also, I have not used brown sugar in either recipe...... a must ingredient in the banana walnut cake, because on all the occasions I have baked this, I never had stock of this sugar in my pantry :) Honestly speaking, I never missed using brown sugar as my cake was tasty without it. Its only recently that I have started adding 1/2 cup of brown sugar to 1/2 cup white sugar. Oh wow, nowadays, I am baking the tastiest Banana walnut cake ever!!! The brown sugar really does work wonders to the flavor.....hmm, heading to the kitchen to indulge in more baking ;) 


May 17, 2012

Peanut Chikki

    As a kid, no vacation to my grandma's place was ever complete unless I bit into my favorite 'Kadalai mittai'. I can still remember how we kids used to buy peanut chikki (peanuts and jaggery toffee) from the store near grandma's home.Each small square would be covered with colored dried coconut shavings, mostly pink and yellow colors. I still love kadalai mittai and bring back a packet each time I visit my mother's place.This recipe is a purely accidental one as I was attempting to make the 'puran' for the delicacy called 'puran poli'.Simply said, the jaggery syrup boiled a wee bit longer and changed color and consistency.Knowing it was beyond the 'puran' point, I hurriedly fried peanuts and added them to the syrup, spread it on a sheet, cut it and lo and behold, I get peanut chikki :))  What a sweet accident it turned out to be! The picture below may not appear very appealing as I was in a big hurry to snap a picture before my tasty chikki was all gone!


Peanut Chikki

Ingredients:

Raw Peanuts - 1 to 1 1/2 cups
Jaggery - 3/4 to 1 cup
Water - 1 cup
Ghee - 1 tbsp (to grease plate)

Method:
1) As you'll need peanuts without the skin, you would first need to remove them. The easiest way to remove the skin is to roast the peanuts.Heat a kadai or saucepan on high and start roasting the raw peanuts.Reduce the flame to medium once you see the skin peeling off.Transfer to a plate and allow it to cool a little. Now using your hand rub off the remaining skin from all the peanuts.Your roasted peanuts are now ready.
2) Grease a plate with the ghee to place the chikki on.I greased a foil and placed it on a cookie sheet.
3) Mix the water and jaggery in a heavy bottomed pan and heat it on high flame till the jaggery dissolves.It is better to use powdered jaggery to make the syrup, as I have always struggled to break hard jaggery balls bought from the Indian store.Strain the syrup once to remove any impurities from the jaggery.Once the strained syrup begins to boil, the jaggery will start to get a thick, glaze like consistency.Take a little of the melted jaggery between your thumb and index finger and check for one string consistency.Continue to boil till you get almost a two string consistency and the jaggery starts to leave the sides of the pan with almost a toffee like appearance.
4) Now remove from the gas and immediately add the roasted peanuts.Mix well and spread on the greased plate.Cut it into squares.Yummy chikki is ready to be relished.

Variation: You could try adding some cardamom powder and colored dry coconut shavings while mixing the peanuts with the jaggery.

Note: I got 20-25 chikki squares. Also, the measurements given here are based on 'Andaaz se' (using your own judgement) as I have already said, this was a on the spur creation to prevent wasting the jaggery syrup :) A lot of traditional Indian recipes handed down from grandmothers to mothers are based on this 'Andaaz se'.The chikki's turned out crunchy, hard and tasty,just like the ones at my grandma's place. But I must admit, the quantity of jaggery was a wee bit more than the store bought chikki. Should have added more peanuts perhaps...some sweet accident, eh!


`


May 14, 2012

Ulundu Vadai/ Medhu Vadai

    Vadai or vada is a south Indian delicacy.Serving up a meal with vadai and payasam is considered the ultimate in 'Athithi Sanskar' (hospitality) in the south.So much so, wedding feasts are considered incomplete without  the vadai...either urad dal (ulundu) or channa dal. Ulundu vadai or Medhu vada is truly versatile.....you can add onions and peppercorns to it, serve it up plain with coconut chutney or sambar, soak it in sambar to create sambar vadai, soak it in lots of home made curd and serve it up with chaat masala and imli chutney to make the mouth watering dahi vada.....the ulundu vadai will never disappoint you :) I learnt to make this vadai from my mom and in true tradition, I used to make the vadais as soon as I ground the soaked urad dal(ulundu).The general belief is that the batter would become watery if the vadais are not made immediately, due to the salt added to it.Apparently, this is not true and I improved my vadai making skills by watching Vahchef Sanjay Thumma on the internet.The secret of making light, crispy and fluffy vadais is to beat the batter by hand to incorporate air after mixing salt and other ingredients.So, here is the recipe for plain vadai.....eat it as is or with coconut chutney.Enjoy!


Ulundu or Medhu vadai with coconut chutney

Ingredients:

Urad dal without the skin (whole or split) - 1cup
Onion - 1/2 (finely chopped)
Curry leaves - few
Pepper powder - 1/2 tsp (you can use whole peppercorns too, instead of the powder)
Salt - 1/4 tsp (the batter should not taste salty )
Hing(Asafoetida) - a pinch
Oil - 1 to 1 1/2 cup for deep frying
Water- about 1/3 cup for grinding and 1/3 cup to soak hands while making vadai

Method:
1) Wash and soak the urad dal in water for atleast 1/2 hour. You can buy this at the Indian store and it is commonly called 'black gram' or 'white lentil'.You don't need to soak the dal for too long.I usually soak it upto a maximum of 2 hours.

Urad dal before soaking
 
2) Grind the dal in a mixie or blender.Add a little water at a time,taking care not to add all the water at one go.Grind to a smooth but slightly thick paste like consistency (the ground batter should not be of a flowing consistency like dosa batter).Transfer batter to a vessel.
3) Now add the chopped onions, curry leaves, pepper powder or whole peppercorns,hing and salt to the batter. Use your hand to blend in all the ingredients.Check the taste of the batter and add more salt if needed. Just keep in mind  that the vadai should taste of all the condiments added to it, not just of salt.Moreover the quantity of salt is kept to a low in this vadai to bring out the flavor of the chutney/sambar/dahi accompanying it. In case you get a salty batter, just add more chopped onions or balance it with more pepper powder.

Ulundu vadai batter ready to be fried!

4) Now comes the trick! Once you have added all the condiments to the batter and mixed it all once or twice with your hand, continue to mix a while longer in a manner so as to incorporate air into the batter. Let the batter rest for about 5 minutes.You can also make this batter a day ahead, refrigerate it and then make vadais.Don't worry...it will not become watery.You just need to leave it outside the fridge for about 15-20 minutes before making the vadais.Also remember to first allow the batter to cool down to room temperature after grinding it, then store it in the refrigerator.
5) Next, heat oil in a kadai or heavy bottomed saucepan on high.To check if oil is hot enough, spoon a little batter into the hot oil.If it sizzles and floats on the top, then the oil is at the correct temperature to fry the vadais. Keep a little water in a glass bowl handy, to soak your fingers into while making the vadai.Wet all the   fingers and using your right hand scoop a little batter out onto your left fingers.Make a hole in the batter and place it in the hot oil. Be very careful while doing this.You could reduce the flame while placing the batter in the oil.Don't worry too much if you don't get the perfect vadai shape.To me, the taste is more important than the shape and it takes a little practice to make perfectly round vadais.
6) Once the vadai turns golden on one side, flip it over and fry till the other side is golden in color.Remove and drain on paper towels.You should be able to fry about 3 vadais in one go.Serve with sambar or the all time favorite, coconut chutney.

Variation: Try adding a few chopped green chillies in lieu of the pepper. Or try a few finely chopped pieces of ginger and finely chopped fresh coriander.

Note: This recipe will make about 15 medium sized vadais.Frying the vadais may seem a little messy process. But I'll bet, you won't stop with eating a few crispy vadais....you will definitely long for more!


May 10, 2012

Badam Burfi

   Burfi is a traditional sweet made for almost all Indian festivals, especially Diwali.The name has its origin in the Persian word 'Barf' (snow) as most burfis are similar in appearance to ice or snow.Plain burfi is usually made with mava (khoya) or condensed milk and sugar with almonds and pistachios for decoration. Nowadays you will find burfi's in all colors, flavors and shapes.... most loved shapes being diamond, squares or rectangles.My friend Isvarya gave me the original recipe from a cook book she had referred to.I looked it up online and found one using lesser sugar.I must admit though that the burfi I made was way less in ghee and different in texture than the badam and kaju burfi's made by my mother-in- law.MIL is an expert in making these...so much so that I usually call her kaju burfi, 'ghee' burfi as she uses tonnes of ghee to lovingly make them :) This recipe is so easy to make....its almost a cinch! The badam burfi I made were really delicious...hmmm, never thought I would be able to make such delightful burfi. And this is a good way to get picky toddlers to eat  nuts, if they are not allergic to them, that is!

Badam Burfi

Ingredients:

Badam(Almonds) - 3/4 cup
Cashew nuts- 1/4 cup (I used cashew nuts as I did not have enough badam)
Sugar - 3/4 cup
Milk - 1/2 cup
Ghee - 2 tbsps
Cardamom - 1 pod (grind to fine powder)

Method:
1) Soak the badam in water for more than an hour, to remove the skin.I soaked the cashew with the badam as I was not too sure if I was to powder them separately.You could microwave the soaked badam for a minute to speed up the process.Peel the skin off and grind the badam and cashew to a fine paste in the blender.I added the 1/2 cup milk to this paste as it was very sticky and ground it some more.This way I could get the fine paste to come out of the blender.You could maybe try grinding the badam, milk and sugar all together, like my friend did.Just use a large jar while grinding, keeping in mind the quantity of paste you will get. 
2) Grease a flat plate or thali with little ghee to pour the burfi into.Set aside.
3) Put the badam and milk paste into a kadai or heavy bottomed saucepan.Add sugar to this and stir continuously on slightly medium to low heat.After about 5 minutes add the 2 tablespoons of ghee and continue stirring on low heat, till the mixture starts leaving the sides of the pan.This entire process takes about 15  to 20 minutes.You will know when to switch off the gas as the mixture would have changed to a slightly creamish color by then. Take care not to burn the burfi mixture. I do wish there was a way to avoid the stirring as my arm did slightly ache as it was my first time.But entirely worth the effort!
4) Remove from the stove.Add the cardamom powder and mix well. Transfer to the greased plate and flatten the mixture with a flat spoon or ladle.Allow it to cool sometime and cut into diamond shaped burfi. You can add a pinch of saffron while adding the cardamom powder.Garnish with silver foil (varki) if you like.

Note: This recipe will make about 30 burfi.

May 4, 2012

Choco- Walnut cookies

  Baking is a passion with my mother. Such is her dedication, that she has at times gone to the extent of baking an entirely new batch of cookies with freshly made dough if she wasn't happy with the previous batch :) Ditto for her cakes! I have eaten so many varieties of her home made cookies....pinwheel, salted, almond, nan khatai,pista, ice box,cornflakes cookies to name a few.In fact, I think there were hardly any times when we ran out of home made cookies.... she enjoyed baking so much :) Anyways ,the recipe I have here was my very first attempt at baking cookies.These are actually sugar cookies, but I added walnuts and few choco chips just for taste.When starting out with the measurements, I had no idea I would have so much dough that it would bake almost five batches of upto forty cookies. So watch out if this is your first time and halve all the ingredients, else be prepared to stand an extra hour in the kitchen.....hmm worth the effort though as these came out just great! My family and friends enjoyed them thoroughly.


Choco-Walnut sugar cookies

Ingredients:
All purpose flour- 2  3/4 cups
Unsalted butter- 1 cup (2 slabs, at room temperature)
Baking soda- 1 teaspoon (tsps)
Baking powder- 1/2 tsps
Sugar- 1 1/2 cups
Salt- a pinch
Eggs- 1
Vanilla extract- 1 tsps
Almonds- 3/4 cup (roasted and coarsely chopped)
Chocolate chips- 1/2 cup or more
Cookie sheet, wire rack and parchment

Method:
1) Preheat the oven to 375 degrees F. In a large bowl, sift together the flour,salt,baking powder and baking soda. Set this aside.Always remember that unless specified in the recipe, all measurements are flat and not heaped. So do not pack the flour in the cup while measuring.Ditto for the baking powder and soda.Take a heapful in a teaspoon and using another spoon or your finger, flatten it out.Add the almonds and chocolate chips, mixing them once.You can add more or less depending on your taste.
2)In another large bowl, cream the butter and sugar with a hand mixer or stand mixer.I made the mistake of using cold butter as I read somewhere that it will automatically melt while being creamed.I must say that it is easier to cream 1/2 cup of cold butter, but 1 cup is a whole lot. I almost ruined my hand mixer doing this.So soften butter till it is at room temperature. If you are in a hurry, you can try microwaving it maybe for about 20 secs till it is just soft, not melted.First beat the butter till it is all mushy, then slowly add the sugar.You should get a pale yellow and smooth texture.
3)Add the egg and vanilla extract and beat again.Gradually blend in the dry ingredients.You can use a spatula for this.Keep in mind that you will be mixing a very large quantity of dough, so use an appropriate mixing bowl.
4)Line the cookie sheet with parchment.Scoop a heaped teaspoonful of the dough, make a small ball and place them on the parchment, 2 1/2 inches apart. You should be able to place 9 such balls on the sheet.Don't worry about the size of the balls as they will spread while baking.
5)Bake them in the preheated oven for 8-10 minutes for soft cookies. If you want crisper and slightly harder golden colored cookies, bake for 15 minutes.Once done, remove the sheet from the oven, leave the cookies on it for a minute and then transfer to a cooling rack. The cookies will appear soft initially, but once cooled they will harden.Will make about 40- 45 medium sized cookies.

Note: Cool the cookie sheet completely before baking another batch, or else use another sheet. If not completely cooled, it will alter baking time as the cookies will start to bake even before they hit the oven. 

April 29, 2012

Rava Ladoo

  Rava ladoo or sooji (semolina) ka ladoo is one of the easiest and quickest sweets to make for any occasion.You can find this ladoo in many sweet shops in South India, but you can seldom make out rava in it.... so fine is its texture, I sometimes feel they actually grind the rava before using it. My husband refers to the store bought version of this ladoo as 'Concrete'.....so hard it is! As a kid, I have had the not so good fortune of having tasted this ladoo made in numerous friends home on Diwali day...and they were very hard to bite into, so much so, we tried to avoid eating these ladoos outside. Well, the ones my mother made would melt in the mouth. Don't really know where she got the recipe from, but here it is....


Rava Ladoos


Ingredients:

Rava (Semolina) - 1 cup (dry roasted)
Sugar - 1 cup
Coconut - 1 cup (grated)
Cardamom - 2 pods (finely ground)
Milk - few tablespoons (tbsps)
Cashew nuts - 1 tbsp (broken in small pieces)
Raisins - 1 tbsp
Ghee - 1 and 1/2 tbsp

Method:

1) Preheat a kadai (wok) or saucepan and then dry roast the rava till the raw smell disappears. Do this on low heat so as not to burn the rava. Once done, remove and cool the rava on a plate. Use upma rava for this as it is easier to make ladoos with it.
2) Place the cooled rava in a large vessel and add the sugar, grated fresh coconut and ground cardamom. Mix all the ingredients nicely. I prefer fresh coconut as it is tastier than the dried version. Either grate a fresh coconut or buy the already grated fresh coconut from the freezer section in the Indian store. You can also halve the amount of coconut, if you don't like your ladoos to contain too much of it. I usually use just 1/2 cup these days as my hubby is not a great fan of coconut.Do remember not to pack the coconut in the cup while measuring, else you may end up with coconut ladoos instead ;)
3)Now heat a small pan and place the ghee together with the broken cashews and raisins.Fry them on low heat stirring continuously till the raisins puff up and the cashews turn a golden brown. Be careful so as not to burn them. Add these to the rava, coconut mixture and mix well. 
4)Next sprinkle few tablespoons of cooled, boiled milk to the mixture,so as to bind it and make ladoos.Immediately mix well,so that the entire rava is coated with milk.I prefer to microwave the milk first, cool it and then use it to avoid the raw smell of milk. But there have also been days when I have used cold milk directly from the fridge, without bothering to boil it. Didn't make much of a difference in taste though or even smell for that matter. A friend once made these ladoos with evaporated milk and they came out quite tasty. She however did not fry the raisins in ghee, but added them as is.Do try it and let me know :)
5) You should now have a wet, sand like consistency of a mixture.Take a handful of the mixture and form small or medium sized ladoos. If you are unable to shape them into ladoos, sprinkle more cold milk and mix again until you get a consistency that can be shaped into a round ladoo. Make ladoos and store them in an airtight container in the fridge, especially in hot summers. They will go bad if left out as they contain fresh coconut. In winters you can keep them outside for a day or two, then refrigerate.These ladoos should stay good upto a week if you can resist eating them, that is!

Note: This recipe will make about 30 small sized ladoos.

April 25, 2012

Chocolate Cake in a Mug

  
Chocolate walnut cake in my coffee mug
    Who doesn't love chocolate cake...hmm, the very mention of this cake in a mug makes me want to go and bake one in the microwave right now. Yup, its a microwave cake and takes exactly 2 and 1/2 minutes on high power. That's it! I found this recipe online after trying out one using a whole egg. It came out ok, but the one I'm about to write down is awesome. It's also the first cake I ever baked and I was absolutely thrilled with the results. So here goes.....

Ingredients:
 First and foremost you need a microwave and a large coffee mug!
All purpose flour - 4 tablespoons (tbsps), measured flat and not heaped
Sugar - 4 tbsps,  measured flat and not heaped
Unsweetened cocoa powder- 1 tbsps (add 1 more tbsp, if you love a lot of chocolate)
Milk - 3 tbsps
Oil - 3 tbsps
Whisked egg - 2 tbsps (Mix the white and yellow yolk with a whisk and measure out)
Baking powder - 1/8 teaspoon (tsps)
Vanilla essence - 1 (tsps)
Walnuts - a few small bits

Method:
1) This recipe is so simple, you can directly mix all the ingredients in the coffee mug itself. But I prefer to use a small bowl to do the mixing. First measure out the flour and place in the bowl. Then add the sugar, baking powder and unsweetened cocoa powder.Mix these all together. You can use unbleached, bleached flour, enriched flour or even maida..... but remember, without the baking powder, the cake will not rise. I have never tried making this with self rising flour..maybe then the baking powder may not be necessary.
2) Now add the 2 tbsps of whisked egg, milk, oil, vanilla essence and walnut pieces and mix well. You can use cold milk. Using a whole egg the first time I made this, made the cake very dense. But the 2 tbsps of egg made it just right. Actually you don't have to trouble yourself to whisk the egg at all. Just mix the white and yellow parts well enough. A fork will do.

All ingredients in the mug!
3) Pour the mixture into the coffee mug and microwave for 2 and 1/2 minutes on high power. Be sure not not keep it any longer, else the cake will turn out very dry. You can spray cooking spray or butter the mug, in case you wish to remove the cake from it. But trust me you will be far too busy eating it once its done :)

Eating warm cake on movie night is absolute yum :)

Note: Double the quantity of ingredients if you want to make 2 mug cakes. Adding 2 tbsps of cocoa powder for 1 mug cake makes it very very rich...last time I tried, it was heavenly...but I couldn't finish it in one go. If you are chocoholic, add chocolate chips! Bake this if you wish to eat warm chocolate cake as a dessert in one sitting or in a few hours. It doesn't taste all that great if kept till the next day (atleast mine didn't). For that I'd bake a cake the traditional way in an oven.

April 23, 2012

Daliya Upma (Broken Wheat Upma)

 Daliya is the Indian name for broken wheat or bulgur. This type of wheat is usually sold parboiled and dried and can be a good substitute for couscous or rice. Daliya is sometimes confused with cracked wheat, which is not parboiled. It has lots of health benefits due to its fiber content. I vividly remember my mother trying to stuff us little kids with daliya porridge almost every day before we left for school. Don't think I really enjoyed my porridge back then, but now I love it with cold milk and sugar. Like rice, you can make lots of dishes with daliya, bulgur, broken wheat or whatever you call it :) Agreed, it does take longer to cook and does not have much of a taste of its own.... but add the right amount of salt, spices or sugar and you can make it mouth watering. Here is the recipe for daliya upma, which has become something of a staple every week at my home.


Daliya upma with coriander, coconut chutney


Ingredients:
Daliya (Bulgur wheat) - 2 1/2 tea cups                                 
Moong dal (Yellow split dal) - 1/2 tea cup
Carrot- 1
Peas- a handful or less
Capsicum -1/2
Beans - 5 to 6
Cauliflower - 6 small florets
Green chillies - 2 slit vertically
Turmeric powder - a pinch
Salt - according to taste
Water - 7 tea cups ( Daliya : Water should be 1: 3 ratio)
Hing(asafoetida) - a pinch
Curry leaves - 3 leaves
Mustard seeds - 1/2 tsp (for seasoning)
Urad dal - 1/2 tsp (for seasoning)
Jeera - 1 to 2 tsps
Ghee/oil - for seasoning

Method:
1) Clean the daliya first to remove any impurities. You can buy daliya at the Indian store. You can choose between the coarse and fine varieties. My family prefers the coarser and more chewy variety for upma as it is tastier. The finer variety is more like semolina or upma rava, only it is light brown in color. To this you can add the measured out moong dal and wash them both together, draining any excess water. Place this in a cooker or heavy bottomed saucepan, with a lid. I use a pressure pan as it is faster.
2) Clean and chop all the vegetables into small cubes. You can use any of the vegetables you use to make rava upma. My default veggies are carrots, beans, peas and occasionally cauliflower. Tomatoes and capsicum add a very yummy flavor too.
3) Now add 7-8 cups of water along with salt and veggies to the daliya in the cooker/saucepan. Add a pinch of turmeric and jeera with the green chillies. You can add the jeera while cooking the daliya or while seasoning it. Add salt to taste. 
4) Close the cooker and cook on high for 7 mins. After about 2 whistles, simmer it and cook for another 5-10 mins. You will know the daliya is cooked when it starts to give out an aroma of cooked daliya. Allow the cooker to cool.If you feel the upma is not cooked well enough, add little more water and cook for another 5 mins. Coarse daliya takes little longer to cook than the finer variety. I have purposely reduced the water to about 8 cups because many times, excess water spewed out of the cooker making a mess. Remember that the above mentioned measurement includes the water to cook the veggies too. Follow the 1 : 3 ratio to get a liquidy consistency, else on cooling your upma will be very hard.
5) In a small saucepan or kadai, heat ghee/oil.Add mustard seeds, urad dal, pinch of hing (asafoetida powder) and jeera.When the mustard starts to splutter, add curry leaves and remove from the gas. Now add this seasoning to the upma in the cooker and stir once to allow it to blend in. 
6) Serve with coconut chutney.


Serving size: This recipe will make about 4 single servings.

April 10, 2012

Plain Paratha

    As the name denotes, this is just a Paratha with no stuffing inside. These usually come out layered as they are folded repeatedly before being rolled out. Sure it does have a wee bit more oil/ ghee content and is a little heavier on the stomach, but nothing can beat the taste of hot parathas with a tasty curry like mutter paneer. Mom used to make them very often when we were young and I remember paratha with egg burji was my favorite breakfast.You can have plain parathas any time of the day. Breakfast, lunch or dinner. They make a tasty snack too. Just smear your favorite jam and roll them....voila you have jam rolls. Like plain cooked rice, these can be the base for any dish you choose to make with wheat. Wraps, rolls, kotthu paratha...you name it, you can work wonders with this bread just like you can with Phulkas and Chappathis!


Plain Paratha
Ingredients:

 Atta (wheat flour) - 4 cups + 1 cup to dust while rolling out
 Salt - a pinch or according to taste
 Oil - 4 to 5 tbsps (to smear while cooking)
 Butter - 1/2 tbsps unsalted
 Water - 1 cup to knead the dough

Method:

1) In a large vessel place the 4 cups of atta and pinch of salt to taste.
2) To this add the unsalted butter and mix well. You can add cold or butter at room temperature. Melted butter should also be fine. Omit salt if using salted butter.

Butter added to the atta
3) Now add the water slowly and knead into a smooth dough. The more water you add and knead, softer will be the parathas. Cover and refrigerate the dough or let it rest for atleast 1/2 hour at room temperature.


Smearing oil to make shapes

4) Make medium sized balls of the kneaded atta, dust them with flour and shape them into rectangles or triangles if you want to. To make a rectangular shape, compress a medium sized dough ball with your hand into a circle. Place some flour or oil inside and take one edge and fold inwards.Now, fold the other edge over the first edge. Repeat the process again and roll out like a rectangle, occasionally dusting with flour. No need to add flour/ oil while folding again. I have shown pictures of the dough folded for a triangular, rectangular and circular paratha.

Rectangular paratha folded once
Double fold to create layers


Paratha rolled out in rectangular shape

Paratha rolled out in triangular shape

5) Heat a tava or non-stick girdle and place the paratha on it. After it changes color on one side, turn it over, smear it with oil and allow it to cook for few seconds. Then turn it over to the oil-less side, apply oil and allow it to cook until done. Store it in a hot-case to keep warm. Serve it with any spicy curry of your choice and enjoy!


Note: This recipe should make about 12 medium sized parathas.


April 3, 2012

Methi Paratha

     Paratha's or Indian flatbread are made with atta (wheat flour) and are a staple in Northern India. These are not to be confused with the Parotta's which are a layered flatbread more popular in Southern India and made with maida (all purpose flour). Paratha's can be made either plain or with some stuffing inside and rolled out flat. My mom's paratha's came in different shapes and sizes...sometimes they were round, rectangular or triangular. The shapes were usually to excite and coax us kids to eat. One of my favorite is the methi paratha or fenugreek leaves paratha. These are made out of fresh methi leaves which are said to have a cooling effect on the body. Sure, it may seem a pain to clean and cut the methi leaves, but the end result is definately worth the effort :) Frozen methi leaves can also be used, after the leaves are thawed, washed once and water completely drained from the leaves.


Methi paratha with curd and pickle

Ingredients:

 Methi leaves (preferably fresh) - 1 Bunch
 Atta flour - 4 tea cups
 Ajwain seeds(Carom seeds) - 1 tbsp
 Besan (gramflour) - 2 tbsp
 Chilli powder - 1/2  or 1 tsp
 Salt - according to taste
 Butter - 1 tbsp (If using salted butter, don't add salt)
 Water - 1 cup, to knead the dough
 Oil - to smear on the parathas while cooking
 Atta - 1 cup ( to dust the parathas while rolling out)

Method:
 1) Clean and wash the methi leaves, taking care to remove all the stems. Dry them thoroughly and chop them finely. Set aside.
2) Take atta (wheat flour) in a large vessel. I usually take about 4 heaped handful of atta. Next, add the ajwain seeds, besan flour, chilli powder and salt to the atta. You can vary the quantity of ajwain, but the more you add, the bitter it can get. Remember that methi leaves are bitter as it is. Also, don't overdo the besan flour as it is only for taste. Too much besan will cause a complete change in taste and you may end up with Theplas instead :) Besan also gives a yellowish tinge to the parathas. Mix these ingredients nicely.
3) Add the butter and mix well. I add cold butter, but butter at room temperature is also fine. Butter is added to make the parathas nice and soft. And it remains soft for several hours, even a day or two.

Ajwain(Carom seeds) and butter added to the atta
4) Next add the chopped methi leaves and mix till the leaves get well coated with the flour.
5) Now add water and knead the dough into a large ball. Let it rest for 1/2 to 1 hour. I usually refrigerate the dough a couple of hours. Its easier to work with it afterwards that way. You can make the dough a day ahead and refrigerate it too. Make sure it does not freeze though.

Kneaded dough with methi leaves
6) Heat the tava or a skillet. Make medium sized balls and roll them out, occasionally dusting them with atta. Place the parathas on the tava and allow one side to cook. When it changes color, flip it over, smear with oil and repeat the process until both sides are evenly cooked.Store in a stainless steel casserole or hot-case with a lid.My mother used to place a fresh kitchen towel inside the hot-case and then place the parathas in them, in order to retain the heat and absorb the moisture created by the heat.I make do without the towel as I am not too keen on having to wash it later on.Moreover I feel the towel causes more moisture build up.
7) Serve with curd and pickle. You can also have this with spicy or plain dal, depending on how much chilli powder you choose to add in your parathas.

Note: The recipe above will make 10 - 12 medium thickness parathas.