September 26, 2012

Melting Moments (Russian Tea Cookies)

 
    I love home made cookies as I know for sure that I wouldn't ever get to see the calorie value of the cookies I bite into, unlike the packaged ones where the first thing I always seem to count are the 'Fat Calories' :) Remember, how the very mention of a food item can bring back some very fond memories......well, the Melting moments cookies does make me a wee bit nostalgic. I do remember how I used to take hand written notes of this recipe to my mother's friends home as a little girl. And the many times mom and her friends would discuss cookies at tea parties, melting moments would definitely find a mention :) These Russian tea cookies are very delicate. Oh, so very delicate they simply melt in your mouth....hence the name. History has it that the Russians baked them for their tea sharing ceremonies during the 18th century. They just mixed flour, water and nuts and baked them, finally dredging the hot baked cookies in powdered sugar. Apparently they added more sugar once the cookies cooled down. The water in the recipe was replaced by oodles of butter over the course of time, which made these cookies really light. The Mexicans have a similar cookie called 'Mexican Wedding Cookies' which uses ground anise as an additional ingredient and are traditionally a part of every mexican wedding. These cookies are better known as 'Snowball cookies' in the US and are a part of Christmas holiday traditions. I baked these cookies recently and was simply blown away by their crisp lightness.  When I told my mother about me baking them, she said she always preferred baking other cookies than baking these. She felt there was much better use of all the butter that went into baking a batch of these.... yup, she sure was health conscious. All the same, indulge in the melting moments cookies first and count all the fat calories later :) 


Ingredients:

Flour - 2 cups (sifted)
Butter - 1 cup (2 sticks, softened at room temperature)
Sugar - 1/2 cup (add a few tsps more if you want sweeter cookies)
Salt -  1/4 tsp 
Vanilla extract - 2 tsps
Chopped nuts - 1/2 or 3/4 cup (chopped and roasted almonds, pistachios and walnuts)
Confectioners sugar - 1/2 cup

Method:


1) Preheat oven to 325 °F. Line a baking sheet with parchment or silpat. You can use a medium or large size cookie tray for these cookies.


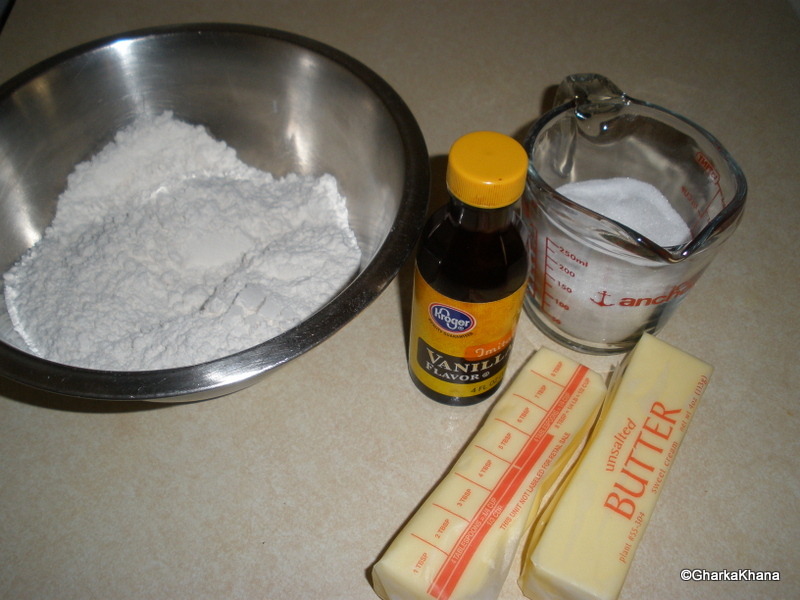
Flour, sugar, butter and vanilla essence
2) Cream butter in a large bowl by beating it with a hand or stand mixer for about 2 minutes till it is very soft. Add sugar and vanilla extract to it. Continue beating the butter for about 3 minutes till the mixture is pale yellow and not gritty. Take care to scrap the sides of the bowl while beating to ensure all the butter is well creamed.
3) Sift together the flour and salt. Remember to measure out 2 cups of flour after sifting it first. That way air will be incorporated into the flour and will ensure soft cookies, since there is no baking soda or powder in this recipe.
4) Divide the flour into three parts and add it little at a time to the creamed mixture and blend thoroughly with a spatula. 
5) Add the nuts and mix well. Use store bought roasted nuts or roast them at home. First chop them into small pieces, then microwave them for about 20 secs at high power. That way they will be crunchy and add flavor to the cookies.
6) The cookies dough should be soft in texture. Scoop out 1 inch balls with a spoon or ice cream scoop and place them on the parchment lined sheet 2 inches apart. Bake for 15-20 minutes till the sides of the cookies are slightly brown. Don't allow the cookies to brown completely. Russian tea cookies are meant to be slightly browned on the sides only.


Cookie dough ready for the oven!
7) Once done, remove the cookies onto a cooling wire rack or another unused baking sheet. Once cooled, roll the cookies in confectioners sugar. You can either buy this sugar at the store or just powder a cup of granulated sugar in the mixie or coffee grinder. 


Cookies left to cool on a baking sheet


Dredging cookies in confectioners sugar
8) Now sit back and enjoy the most delicate cookie ever......just melts in your mouth!!!


No one can eat just one :)


Note: This recipe should make close to 3 dozen cookies. It should store upto 2 weeks in an air tight container.

September 20, 2012

Black Forest Cake


Black Forest Cake with Strawberries
    I vividly remember the times I visited the 'Nilgiris Bakery' on Brigade road in Bangalore as a kid. I was  irresistibly always drawn to the 'black forest pastry' :) in spite there being so many other delicious looking pastries...hmm, guess it was either the tantalizing chocolate factor or the rather mysterious name that drew me towards it ;) I was allowed to indulge myself at times, but on many occasions I was denied the pleasure of eating my favorite pastry, since my mother believed that it was only chocolate color and no real cocoa in the pastry. And she wanted to keep my teeth safe from the excess sugar! She was mostly correct about there being no real cocoa (or rather a sparing amount) in the pastry, as the last time I ate the pastry at Nilgiris as an adult, I was thoroughly disappointed. But I must admit that no matter which bakery I go to in India or anywhere I visit for that matter, I am always on the lookout for the Black Forest. This cake or pastry has its origins in the black forest region of south western Germany and is named after the specialty liquor 'Schwarzwälder Kirsch', that is distilled from tart cherries. A typical black forest cake has several layers of chocolate cake with whipped cream and pitted maraschino cherries in between. Then the entire cake is covered in whipped cream and decorated with whole cherries and chocolate shavings. Traditionally the tart cherry liquor was added to the cake layers, but it may be substituted with rum. Since its this alcoholic Kirsch that gives this cake its unique and absolutely heavenly flavor, this cake is truly called  'Schwarzwälder Kirschtorte'  (Black Forest Cherry Torte).


     I baked this cake for the first time for my little son's birthday and had no idea it would turn out a big hit! I used fresh strawberries as I love them more than cherries. Moreover I could not get fresh maraschino cherries and did not want to used the canned variety. I did not use any alcohol whatsoever to wet my cake... instead, I steeped some strawberries in sugar syrup and used the syrup in lieu of the kirsch. I would call this the asymmetrical cake as I baked two very moist chocolate cakes in disposable pie pans, didn't bother to trim the cake edges to a circular shape, layered one cake on top of the other with the whipped cream and strawberries in between....lo and behold , I made my very own tasty black forest cake! And this recipe is so easy, you will absolutely love it. 

Ingredients:

All purpose flour - 1 3/4 cups
Sugar - 2 cups
Cocoa powder - 3/4 cup
Baking powder - 1 1/2 tsps
Baking soda - 1 1/2 tsps
Salt - 1 0r 1/4 tsp (I always add a slightly more than a pinch of salt)
Eggs - 2
Whole milk - 1 cup
Oil - 1/2 cup ( Canola or any vegetable oil )
Vanilla extract - 2 tsps
Boiling water - 1 cup
Chocolate bar (for shavings) - 1 (160z) use the one with 70% cocoa

For decorating between the cake layers:

Maraschino Cherries - Fresh or 1 can (20 oz), drained ( you can cut and pit fresh cherries,  not necessarily the maraschino variety. The ones in the can will already be pitted and cut. If using fresh strawberries, wash and slice them into thin pieces. This will make it easier to layer the cake.)
Kirsch or brandy or rum - 1/4 cup

If you desire to refrain from using any alcohol, then you can make your own fruit in syrup to wet the cake layers. I have used this in the above cake, as mentioned before.

Fruit in syrup:

Water - 2 cups
Sugar - 1/2 cup or 3/4 cup (if you want a very sweet cake. Black forest cakes should be slightly tart, to allow the chocolate flavor to stand out.)
Fresh cherries (any variety will do) or fresh strawberries - 1 pack (8 oz or 16 oz, if you want many layers of cake)

Method:

Boil the 2 cups of water and add the 1/2 cup sugar in it.  When the water boils, add the cut and pitted cherries or sliced strawberries. Cook for 5 minutes and cool completely. Refrigerate juiced up fruit.


Preparing fruit in mild sugar syrup


Steeping strawberries in syrup


For the whipped cream topping:

Heavy whipping cream - 1 cup or 1 1/2 cups (8 fl.oz or 16 fl.oz pack, if you want more cream)
Sugar - 1/2 cup
Vanilla extract - 2 tsps

Chill the container in which you wish to whip up the cream in. If using a stand mixer, place the bowl in the refrigerator for about 20 minutes. If using a hand mixer, place the wire whisks into the fridge too. I usually place the wire whisks into the bowl and place them in the ice box for a good 1/2 hour. That way on whipping up the cream, it will retain the stiff peaks a while longer. Pour the chilled heavy cream into the cold bowl and beat on high speed for about 3 minutes. Add the sugar, vanilla extract and beat again till soft peaks form. Don't over beat, else it will become butter. You can whip up the cream as the cake cools, cover it with cling wrap and place it in the ice box, until it is ready to use.

Method for baking the cake:

1) Preheat the oven to 350°F. Grease and flour two 9 inch round cake pans.


Greased and floured pan 


2) Whisk or sieve together the flour, baking powder, baking soda, cocoa powder, salt and sugar in a large bowl.


All the dry ingredients sieved together

3) Beat eggs or add them directly with the milk, oil and vanilla extract to the dry ingredients.  Beat all the ingredients on medium speed for 2 minutes. Remember to use a really large bowl for this as mixing all the ingredients will increase its volume.
4) Stir in 1 cup of boiling water. You can microwave it on high for 2 minutes until water boils. Stir the batter well. It will be of a very thin consistency.


Chocolate Cake batter before placing in the oven
5) Now divide this batter equally between the prepared pans and bake for 30 to 35 minutes . Test for doneness with an inserted toothpick. It should come out clean. Cool the cakes completely in the pans or remove them from the pan to a wire rack.
6) Once cooled, level both cakes by removing any peaks from the center. If you have used baking strips, then you would not have to level the cake as it would have risen evenly. Place one cake on the serving platter you wish to serve the cake on.


One layer of cake placed on the serving platter

7) Wet the cake with a few tsps or so of the prepared fruit juice. Take care not to wet the cake too much, else it will become a pudding. Start from the sides and move on the center of the cake. If using kirsch or rum, sprinkle few tsps of this of the cake to slightly wet it.
8) Take a dollop of whipped cream, place it on the center of the cake and with a spatula evenly spread it round. Place the cherries or strawberries in juice on the cake, after draining the sugar syrup.

Whipped cream and drained strawberries on 1st layer of cake
9) Place another layer of cake on top of the 1st cake, wet it with the fruit juice, add whipped cream and level it. Cover the sides of the cake with more whipped cream. If you have a pastry bag, you can pipe rosettes onto the top of the cake. In the picture below, I have placed the second cake atop the first one.


Cream covered two layered cake, with tiny rosettes

10) Take the bar of chocolate and using a knife or melon baller scrap the sides to get shavings. Take care to do this as fast as you can as holding the chocolate too long will start to melt it. Gently lift the shavings with a flat knife or spatula and place them on the sides and top of the cake. If you find it challenging to place the shavings on the cake, use your imagination and decorate the cake as you please :)
11) Place glazed or fresh maraschino cherries with the stem on the top of the cake or decorate with sliced strawberries. Enjoy!


Cake without the decorative strawberries. My son ate them all !! :)

  I also tried decorating just a single layer of the cake with cherries. For this, just take one layer of cake, place it on the serving platter and slice it into two even halves by turning the platter and running a knife through it. Follow the same procedure of placing whipped cream and cherries in juice between the layers and decorating with more cream and cherries.


Black Forest cake with cherries

Yummy Schwarzwälder Kirschtorte !


A slice of the delectable Black Forest Cake !


Note: This is a very moist and spongy cake. You might wonder how using just 2 eggs can make a cake so spongy..... trust me, I had the same doubt, but after baking my cake, I was  surprised too. Mixing all the ingredients is almost like baking a cake out of a boxed cake mix. On one occasion, I forgot to add the boiling water, but still got a moist, but slightly dense cake. You can use both cakes to make the black forest or else use just one, slicing it into 2 or more layers. You can try freezing the unused cake and use it later on. I did try doing that once, but was not very happy with the cake once it was thawed. Maybe I did not do a good job trying to freeze the cake.