September 20, 2014

Aloo Paratha (Parathas with potato filling)


   It is my belief that the humble potato is the most versatile of all vegetables :) Versatile, because you can make absolutely anything with this tasteless veggie. Either fry it, bake it or mash it with salt, or a little sugar, spice it up or just eat it plain boiled... the tattie will seldom disappoint you. And why should it? After all, its what most of the world is eating right now..... as the famous 'French Fries' ;)) Potatoes are a rich source of carbohydrates and often consumed in lieu of rice, which is a staple diet of most Asians. We south Indians, especially tamilans sometimes avoid 'the spuds' like plague as they are known to produce a lot of gas and ahem, no one wants to be around a 'gassy' person :) Even though there are tonnes of recipes that use the potato, to me the aloo symbolizes just one tasty dish... my favorite 'aloo ka paratha'. Piping hot aloo parathas with curd (dahi) and home made avakkai urugai (mango pickle) were indeed a very welcoming site for a frosty winter morning. The combo of curd and acchar (especially mom's tomato pickle) is truly unbeatable! Truth be said, I can never eat these parathas with any curry or veggie fry... the original paratha taste is always lost. I did eat a lot of these with jam...hmmm, now that's another good combo, especially for kids. Smear jam and roll it up or just eat each small paratha piece with a little jam. As a kid, I always felt an awe watching my mom make these parathas. It seemed a big deal back then, but now making them is a breeze. Just knead the wheat dough for the paratha, boil the tatties and add all the masalas, stuff them in the wheat dough and make parathas. This recipe is so simple, you will most probably find yourself making this ever so often, just like me. Make it for a hearty breakfast or a heavy dinner, you will love it. You can even make it any style....south or north Indian, just alter the masalas you add to the boiled potatoes. And it is a time saver, especially when you are out of veggies and the only veggies you have in the fridge are the beloved tatties! And don't forget the curd and pickle :) Indeed this was the best breakfast ever at home and a family favorite...with my dad, my brother, my mom and me all gathered at the family table enjoying warm parathas with curd and mummy's home made tomato pickle :)

My Mummy made this :) Love her for my favorite dish!

Ingredients: South Indian style

Potatoes - 8 (medium sized, red or white russet variety)
Onions - 1 (finely chopped)
Chilli powder - 1 to 1 1/2 tsps (add more as per taste)
Turmeric powder - 1/4 tsp
Mustard - 1/2 tsp (optional for seasoning)
Salt - to taste
Oil - 2 tsps for tadka (seasoning) and 5 tbsps for making paratha
Dry atta(wheat flour) - about 1 cup (to dredge stuffed atta while making paratha)

Ingredients: North Indian Style

Potatoes - 8 (medium sized red, or white russet variety)
Onions - 1 (finely chopped)
Chilli powder - 1 to 1 1/2 tsps (this is optional if using green chillies, so add as per taste)
Turmeric powder - 1/4 tsp (optional for seasoning)
Salt - to taste
Jeera - 1 tsp (optional for seasoning)
Green chillies - 1 (finely chopped)
Garam masala - 1/2 - 1 tsps (I use ready made masala)
Amchur (dried mango powder) - 1/4 tsp or  more ( this is optional, but gives a tang to the                                                                                                    masala)
Oil - 2 tsps for tadka (seasoning) and 5 tbsps for making paratha
Dry atta(wheat flour) - about 1 cup (to dredge stuffed atta while making paratha)

Ingredients: Paratha dough

Atta (wheat flour) - 4 tea cups 
Salt - a pinch
Water - about 2 cups or as required

Method:

1) Wash and cut the potatoes in half.  Boil them in a pressure cooker with just enough water so as to immerse them. About 2 whistles in the cooker with around 5 minutes of simmer time are enough to cook them. Allow the potatoes to cool until they are just luke warm to the touch. 

Boiled potatoes with skin

2) Peel the potatoes when still warm and mash them in a container. Use a potato masher, a ladle or just your hands. If you allow them to cool completely, it will become difficult to mash and you will end up with big chunky pieces. Set aside.


Boiled potatoes without skin


Warm mashed potatoes

3) Measure the atta (wheat flour) in a container, add salt and required water. Knead into a pliable soft dough. I usually place the kneaded dough in the fridge for a couple of hours as I am not very adept at making parathas with freshly prepared dough. Don't forget to cover the dough lest you want odors from the items in the fridge to add to your paratha flavor.


Kneaded dough
4) Next, heat the 2 tbsp of oil in a kadai or thick saucepan. Chop the onions finely and set aside. For South Indian style, once oil is hot enough, add mustard if you want to, then add chilli powder, turmeric powder and stir fry without burning the masalas. Add the chopped onions and fry till the onions are dark brown. Add salt to the onions. Then add the mashed potatoes and turn off the gas. Mix the potatoes with the onions nicely so that the salt and chilli powder are evenly coated over them. Add more salt/ chilli powder if needed. chop green coriander and garnish once mixture is cooled (optional).


Stir frying onions with turmeric and chilli powder


South Indian style stuffing
   For North Indian style stuffing, heat 2 tbsps of oil and when it is hot enough, add the jeera and allow it to splutter. Lower heat and then add the chopped green chillies, followed by turmeric powder and garam masala powder. Add 1/2 tsp of chilli powder if more spicy stuffing is needed. Add chopped onion, stir fry till golden brown and add the potatoes and salt. Turn off heat and mix well to make a homogenous mixture. Add amchur powder if needed.
5) Heat a tava or skillet. Take a small lemon sized ball of atta (kneaded wheat flour) and flatten it out into a disc with the center slightly thick and the edges slightly thinner than the center. Take a tablespoon of the stuffing and place it in the center of the flattened atta disc. Hold the disc with stuffing in the palm of one hand and with the other gently, fold the atta over the stuffing, sealing it within the atta. 

Stuffing in the center of the flattened atta disc
Atta disc with the stuffing 
6) Dredge the stuffed atta disc in dry flour and roll it into flat thin/ thick parathas. My mother likes to roll her aloo parathas really thin, almost like rotis, and nowadays, I do the same :) I know a lot of people associate a paratha to be very thick...actually that's how its supposed to be, but then,sometimes we all do our own thing! I find that rolling mine somewhat thin helps the stuffing to spread evenly and the paratha cooks very evenly too.

Aloo paratha rolled and ready for cooking
7) Heat the tava on high and place the rolled paratha over it. When the color of the dough changes slightly, flip over and smear oil evenly over the paratha. Now lower the flame and when you see dark spots or bubbles forming, flip again, smear oil and allow to cook. Ensure that oil is sufficient and paratha does not burn. The hallmark of the aloo paratha is that it should appear oily, as that's where all the taste is ;)) So, don't cut back on the oil.. be liberal, enjoy a hearty meal....count the calories and number of parathas eaten later.

Color of paratha changing when slightly cooked
Oil smeared paratha flipped over
8) When both sides of the paratha are cooked evenly, remove from the stove and place on a plate or casserole (hotcase) to keep warm. This paratha is best eaten piping hot, especially in winters. Serve with curd and pickle, like I said above for best taste :) Or eat it with raita, raw green chilly and onion....hmm, from what I remember there were times I ate this with salted butter, in lieu of curd. Yup, I love this paratha with a dollop of jam too. And it tastes good plain too, all by itself, without the accompaniments.

Aloo paratha waiting to be eaten!

Note: Don't fret if the paratha is not spicy enough when eaten plain. That's where the pickle comes in..to make up for any lack of taste. If you want to avoid pickle, make the stuffing spicy or better still add chat masala to the katori of curd. Any leftover stuffing can be used as masala for dosa, to make aloo bonda, tikki, sandwich base, pav bhaji masala, stuffed bread roll etc.In short, there are no dearth of recipes you can make with the spud! 


June 6, 2013

Marble Cake

 
   Nope, the marble cake does not have the round marbles we used to play as children ;) In fact, this cake originated in Germany somewhere in the 19th century, when a batter with darker ingredients was lightly mixed into a yellow cake batter, to create a streaked or mottled appearance, something similar to our childhood marbles. The original marble cakes were made using molasses and different spices, especially cinnamon. When many German bakers immigrated to the US after the world wars, they began using chocolate instead of the spices, thus giving us today's famous marble cake.... lovely chocolate swirls inside a vanilla cake :) It need not always be chocolate, I later came to know.The marbling effect can also be done using pink food color (rose milk, in India) or with multiple food colors (red, green, chocolate and vanilla). If I can remember well, my mom's marble cake was usually a pink and white color cake. An avid baker, she seldom repeated the same cake recipes. So, sometimes it was chocolate swirls, rainbow marble cake or her favorite pink and white. Yup, I very well remember it being a part of my snack/ lunch box. The recipe I have posted here is from her collection and the some of the photos are of the cake I baked in my mother's home, this last trip to India in December 2012.


Triple colored marble cake
Ingredients:

All purpose flour - 2 cups
Sugar - 1 cup
Baking powder - 2 tsps
Oil - 1/2 cup + 2 tbsps
Eggs - 4 ( I used large white eggs at room temperature)
Milk - 1/2 cup (optional, add only if you feel adding oil does not bring out batter consistency)
Vanilla essence - 1 tsp
Salt - 1/4 tsp
Cocoa powder - 1 and 1/2 tbsps (for triple colored marble cake)
Rose pink essence - 1 tsp or 1 and 1/2 tsp if you want a darker color (I used the Indian 'rose milk' essence and the smell and taste overpowered the vanilla flavor. Luckily this subsided after a day and the cake tasted much better the next day. Truth is, baked goods always taste better after a day. Use an essence or food color which is less overpowering. Actually, any color of your choice will do. Hmm...I am yet to try using food colors in my baking)

Method:


1) Preheat the oven to 350 degrees. Grease and flour either a 9 inch round pan or a 9.5 inch square pan. I tried baking this cake in both types of pans. The pink and white cake was baked in a round pan and the multicolored one in the square pan.
2) Sift together the flour, baking powder and salt in a large bowl. To this, add the sugar. Since we get finely granulated white sugar here in the US, I just add it. But in India, it is better to first powder the sugar as the crystals are bigger. While measuring, take a 1 cup measure and then powder it. If directly using powdered sugar, you may need 1 and 1/4 cups, but I am not too sure of this measurement :) Mix the dry ingredients well with a whisk.


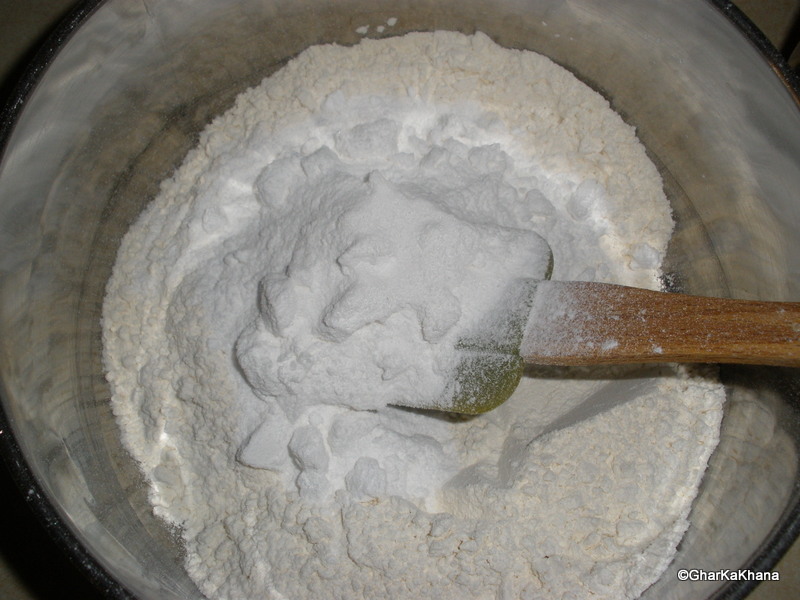
Sifted flour with salt and baking powder
Adding sugar to the flour


3)  In another bowl, beat the 4 eggs on medium speed till they are frothy. Should take a minute for this. Add vanilla essence and beat for 10 seconds.


Beaten eggs with vanilla essence

4) Now make a well in the center of the bowl containing all the dry ingredients. Pour the oil  and milk into this well and cut and fold the dry ingredients with this, mixing well.


Pouring oil in the 'well' :)


Mixing eggs with dry ingredients


All mixed well :)

5) Divide the batter into two halves, if you want to marble it pink and white. To one half, add the pink food color and mix well, taking care not to over mix. If using a round pan, first pour in the white vanilla batter in a semi-circle, taking care to keep it on one side of the pan. Now  pour the pink colored batter on the other side of the pan in a semi-circle, completing the circle of white and pink batter. The batter may seem to get mixed up, but don't worry,they won't. Repeat the same process, if using 3 colors too.


Batter colored pink :)
Half pink, half white batter  in a round pan


Making chocolate colored batter for triple color marble cake

Chocolate, pink and white batter alternate in a square pan

6) Take a fork and gently run it between the two batters. This motion will create the marbling effect, mixing the two batters just enough. Do not over mix, else you might get too much of one color overlapping the other. But worry not, if you feel the batters are mixed too much.... you can always create art work of your choosing !!

Marbling the batter in the round pan .... the proof of the effect can be seen in the cake ;))

Marbling effect in triple colored cake :)

7) Place the pan in the pre-heated oven and bake for about 30 - 35 minutes or until toothpick inserted comes out clean. Allow the cake to cool in the pan itself and when completely cooled, cut into round or square pieces. Keep the pieces in an airtight container. This should stay fresh for atleast 3 days. If its peak summer, refrigerate the container as cake may get spoilt due to excess heat and humidity.

I know, I know.... the pink color was not enough for the round pan :(

Ta Da :)) Marbling effect finally here !! 
Note:
  The cake I baked in the round pan was perfect, albeit a bit colorless :)) I did not add any milk in this, but added the 1/2 cup milk to the triple colored one as I felt the batter was a bit too thick. Like I said before, the milk is optional, as the 4 beaten eggs and oil are sufficient to provide the necessary moisture to mix the cake batter.

May 1, 2013

Fish Fry (Ooli meen varuval)

 
    Nothing can beat the flavor of fresh local ingredients and I always find that I am never able to replicate the taste of many of my mom's delicacies, be it simple 'paruppu sambhar' or even tomato chutney :) I think it has to do with the taste of the onions, tomatoes, the local vegetables and off course, my mom's 'kai pakkvam' (magic of the hands - In south India, this is a term used to refer to how good a cook one is ). On a recent visit to India, I got to taste 'Ooli meen curry' at a neighbor's place and just loved it. This was the first time I came to know of the 'Ooli meen' which is the Tamil name for the Barracuda fish, found in tropical and sub-tropical waters. Such was my desire to taste this fish again, dad and me were lucky enough to find it at the local fishmongers, that too quite fresh. The usual way we prepare fried fish at home, is to marinate it with salt, chilly powder and turmeric powder. Occasionally mom added corn flour to it or if she found a new recipe, she would spice it up further. This time round, I prepared the fish and found a time saver in the paneer butter masala mix as I didn't feel like adding a whole lot of individual masalas to my fish ;) This masala mix is a combination of  many spices like dry ginger, bay leaf, nutmeg, cardamom, fenugreek leaves, mace, caraway, cashew nuts etc. I must say that it did add a tang to the flavor, so much so, my little son absolutely loved this fried fish and I felt like one good mom, happy that her fledgling finally loved his fish!


Ingredients:

Ooli fish (Barracuda) - 3/4 kgs or 1  1/2 lbs (fish should preferably be fresh and cut into       
                                                                              small 2 inch thick pieces)
Chilly powder - 1 and 1/2 tsp
Turmeric powder - 1/2 tsp
Salt - 1 and 1/2 tsp (add according to taste)
Paneer butter masala powder - 1 and 1/2 tsps
Corn flour - 1 tsp (add 2 tsp, if you want the skin to be crispy )
Oil - 4 tbsps (for shallow frying, I used sunflower oil)

Method:

1) Thoroughly wash the pieces and drain any water from the vessel.
2) Sprinkle turmeric powder, chilly powder, salt, paneer butter masala on the fish and mix them well, so as to evenly coat the pieces.
3) Finally sprinkle the corn flour and mix once more. Leave the fish marinated for an hour or so. You can also cover this with cling wrap and fry it the next day, but there is nothing more delicious than fresh fried fish :)

Marinated fresh ooli meen

4) Heat a heavy bottomed saucepan on high, reducing the flame slightly when it is well heated. Use a regular or non-stick pan, depending on your choice. Smear some oil on the pan and place a few marinated pieces on the pan, leaving enough space to flip them over. Add some more oil on the fish and when one side is slightly cooked, turn over. Allow the fish to cook well on both sides. Next, flip the fish over on its side to cook the sides too. The entire process should take about 10 minutes. You can also deep fry the fish if you so desire. Just be sure to discard the oil used for deep frying, as you wouldn't want the smell and taste of the fried fish to permeate other foods you intend to fry.


Fried fish on the traditional 'Dosai kal'
5) Drain any excess oil on a paper towel. Since this is shallow fried, you will hopefully not need the paper towel :) There you are, fried fish ready! Take a fork and dig in or better still, use your hands......food always tastes better when eaten with the hand.

Note:
  You don't need any chutneys or accompaniments to eat this fried fish. It tastes good as is. If you so desire a chutney or a dip, hot thick mint chutney would be a good bet. Just be sure to check how salty your fish is before you add salt to your chutney.

November 18, 2012

Rava Upma (Semolina upma)


    Rava upma or uppuma is a southern breakfast delicacy which is tastiest when lapped up piping hot. Have it as is, eat it with your favorite pickle, thick coconut chutney, oodles of curd or my childhood favorite...sugar :) The origin of the upma is from the concatenation of two words, namely 'uppu' (salt) and 'maavu' (flour), which was intended to mean 'salted flour'. Well, I don't know how salty it was originally meant to be, but most people I am sure add palatable amounts of salt to the dish. Aha, this reminds me of an 1970's anecdote my mother once told me. Apparently, a north Indian friend of my parents was very keen on making rava upma for a picnic. The friend was so carried away by the literal name of the dish, that he ended up adding tonnes of salt to it...and it really became 'uppu-mavu', so very salty, no one could even taste it! :)) Upma is mostly called upma in most places in the south, but region specific names would be calling it Uppittu in Karnataka, Uppindi in Andhra and Uppumavu in Kerala. The famous Kharabath of Karnataka is upma with sambhar powder and garam masala added to it....a real compliment to the sweet Kesaribath or Sheera (Rava Kesari /Sooji halwa). Upma is easy to make. You stir fry rava (semolina), season it with mustard seeds and curry leaves, add fried veggies with green chillies, then cook the rava in water with salt. A lot of people hate eating upma as it tastes bland most of the time, reason being that masalas and chilli powder are not added to this dish. Moreover, upma is more on the greasy side as you have to be a bit generous with the oil used for seasoning :) Upma made with very little oil is totally unpalatable. It tastes as though the rava has been cooked  only in water or as my husband would call it.... 'Concrete' ! And it is lumpy. I bear testimony to this, as my first attempts at making upma were disastrous. I could only make a lumpy white substance which I called 'my rava upma'.


Ingredients:

Rava (Sooji) - 2 tea cups
Onion - 1 thinly sliced
Carrots - 1 (chopped into small pieces)
Beans - 4 
Peas - 1/4 to 1/2 cup ( use fresh or frozen peas)
Cauliflower - 2 to 3 florets
Tomato - 1 (finely chopped)
Green chilly - 2 (slit vertically)
Turmeric powder - a pinch (optional)
Asafoetida powder( Hing) - a pinch
Salt - according to taste
Water - 4 tea cups (ratio of rava and water should be 1:2) 

For seasoning:

Mustard seeds - 1/2 tsp
Urad dal - 1/2 tsp
Channa dal - 1/2 tsp
Curry leaves - 3
Oil - 3 to 4 tbsps

Method:

1) Heat a kadai or any thick bottomed saucepan on high flame. Once it is hot enough, reduce the heat to low and roast the rava till the raw smell leaves, taking care not to burn it. Remove the roasted rava before it turns a golden brown. Its alright if there are a few specks of slightly browned rava :) Set aside on a plate.


Roasted Rava (Sooji)

2) In the same kadai, heat oil and when it is hot enough, add the mustard seeds, urad dal, channa dal, slit green chillies, curry leaves and hing. When the mustard seeds start spluttering, add the onions. Fry them till they are translucent, then add the tomatoes and fry again.
3) Now add the remaining veggies, namely carrots, chopped beans, peas and the cauliflower and fry till they just change color, but remain slightly crunchy. I prefer my upma veggies to be slightly crunchy, so I don't fry them too long :) I usually reach out for the English veggies  while making upma, but you can use just about any veggie you want like potatoes and capsicum. You might like to refrain from using veggies like brinjal and lady's finger though ;)
4) Once the vegetables are cooked or fried to your heart's desire, add water with salt and turmeric powder, if you wish to dig into a yellow colored upma. Upma, to me has mostly been a pearly white, so I seldom add turmeric powder, unless I feel I want a change in appeal. I  also add 1 or 2 extra cups of water, as I find adding more water cooks the rava better. Moreover, my husband likes his upma to be of a gooey consistency, rather than the grainy texture produced by adding water in the 1:2 ratio. 


Water with salt kept for boiling
5) Allow the water to boil. This should take about 2 minutes. Once the water starts boiling, reduce the flame to medium low and add the roasted rava. Try to add the rava at one go and stir immediately to prevent the formation of lumps. Take care when you add the rava as it will tend to splatter and you don't want to get singed by hot rava :) Keep stirring till the rava gets cooked. You will notice that the rava will absorb all the water and the upma will start to become thick. Once done, switch off the heat and dig into hot rava upma :))


Upma Ready!

Serving Size: Above recipe will serve two people for two helpings.

Note: You can also try mixing the roasted rava with the stir fried veggies and freezing it in a zip lock bag or any thick polythene bag in the freezer. This mixture should stay for a month or two at most. As and when you wish to make upma, just boil water with salt and add the rava (you don't have to thaw the rava as you will be adding it to boiling water) .... you will get instant upma. I have tried doing this and it is a time saver :)  I tried making this after a month of freezing my home made upma mixture. Here are the steps to make this an easy recipe:

1) Heat some oil and do thadka (seasoning) with the mustard seeds, urad dal, channa dal, hing, green chillies and curry leaves.
2) Add onions and other veggies when the mustard starts to splutter. Add turmeric powder and fry the veggies till they are crunchy. Then, add the unroasted rava and fry again till the raw smell of the rava is gone. Alternately, you can roast the rava before hand and then mix it to the veggies.
3) Cool this mixture well before freezing it in the freezer.


Roasted rava with the stir fried veggies and seasoning
4) Boil water in the 1:2 ratio or 1:3 ratio as mentioned above, add salt according to taste (this includes salt for the veggies and rava as well). Remember you cannot adjust salt once the rava is added or when the upma is done. Upma by itself is a very bland dish and that's why most people avoid eating it. So just make sure that your water does not taste very salty and has just the right tinge of salt in it :)
5) Add the rava with fried veggies and stir till it is done. Serve the upma with coconut chutney or your favorite pickle or sugar. 


October 20, 2012

Eggless Chocolate Cake


    I have been wanting to try eggless baking for a while now and after some searching on the web, came across this easy recipe for chocolate cake. I tried baking this recently and was so surprised with the result, I just had to blog about it! Most recipes for baking always call for the use of eggs to add texture, increase the volume and enhance the taste of the baked goods. Eggless baking on the other hand uses egg substitutes to get the same end quality. These substitutes may be products like distilled vinegar, condensed milk, pureed fruits like applesauce, pureed tofu, curds etc. I had a tin of condensed milk on hand, to use if I needed, but decided against it as I wanted to eat something chocolaty without making too much of an effort. This recipe uses vinegar in lieu of eggs. Do try this and tell me how much you liked it :)

Luscious cake to bite into :)
Ingredients:

All purpose flour or maida - 1 and 1/2 cups
Cocoa powder - 3 tbsps
Sugar - 1 cup
Oil (any vegetable oil) - 1/4 cup (I used canola oil)
Water (at room temperature) - 1 cup
Baking soda - 1 tsps
Distilled white vinegar - 1 tbsp
Salt - 1/4 tsp (I used just a pinch)
Vanilla essence - 1 tsp
Walnuts - a handful (roasted in the microwave for 20 secs, to make them crisp)
Chocolate chips - a handful

 ( I added the walnuts and chocolate chips to enhance the taste and indulgence. You can leave them out, if you so desire to )

Method:

1) Preheat the oven to 350° F. Grease and dust a 9 inch round pan. 
2) Sift together the flour, cocoa powder, baking soda and salt, till all lumps are removed. Set it aside in a  bowl.

Adding the flour, cocoa powder, soda and salt

Sifted dry ingredients
3) In another large mixing bowl add water, then add the sugar and stir together till the sugar is all dissolved. Now add the oil, vanilla essence and distilled vinegar. Stir just once to blend the liquids. Take care to pour just the measured quantity of vinegar. Excess vinegar will make the cake taste tart.

Water, sugar and oil mixed together
Vanilla and vinegar added to the sugar mixture

4) Add the dry ingredients to the liquid in two parts, mixing well with a spatula. Take care to see that there are no lumps of dry ingredients. Don't over mix as once the vinegar comes in contact with the baking soda, it will begin to react. The batter will be a little watery and thin. Don't worry, you are assured of getting a fluffy cake :)
5) Now add the walnuts and chocolate chips, mixing once or twice with the spatula to blend them well. Pour the batter into the prepared container and bake for 30-35 mins or until an inserted toothpick comes out clean. 

Batter with the walnuts and choco chips in the pan :)
6) Take the cake out from the oven and cool it in the pan itself or remove it from the pan onto a cooling rack. Once cooled, cut into pieces and store in an air tight container. Refrigerate the cake if it is summer, else it should stay out for about 3 days, if you don't have a go at it ! 

Hmmm..Eggless chocolate cake ready !!

  
Note: This is a very moist, soft and fluffy cake....so much so, its hard to believe it is eggless.  I was a little surprised to see the walnuts on the cake surface when I was expecting them to actually sink :) The choco chips being denser were mostly at the bottom of the cake though. You can convert this recipe into a eggless Black forest cake too. Sure, the amount of cocoa powder may seem less. Just double the quantity of the ingredients and bake two cakes and proceed to follow the instructions I have written down for the Black forest cake :) I must admit that I am yet to try the eggless version of the black forest myself, but will  try it out soon. But knowing how good anything chocolaty can taste, I am sure it will come out good.


October 17, 2012

Tayyir Sadham (Curd Rice)


  Apart from Idlis and Dosas, the next best thing that happened to South Indian cuisine, especially Tamil cuisine, is the Tayyir Sadham (curd rice) or dahi chawal, as it is called in North India. In most households, this rice item is usually consumed after all the spicy sambhars, kulumbhu's and rasams are savored. The usual way of eating tayyir sadham is to just mix cooked rice with home made curd or plain yogurt. But the tayyir sadham served at hotels or taken along as 'Katthu sadham' (parceled rice or 'picnic rice', as I prefer to call it) is prepared quite differently. Aah, old memories are kindled yet again......who can ever forget all the sweet times spent with cousins, aunts and uncles, out on a temple trip and my grandma serving tamarind rice (puli sadham) followed by curd rice and pickle on a plantain leaf for a sumptuous lunch :) Eating out of a banana or plantain leaf truly  elevates the taste of food :)Tayyir sadham prepared for a picnic or as a meal in itself starts with the preparing of cooked rice. The rice is usually cooked the previous night itself. In the mornings, the rice is mashed up, boiled milk is added, followed by a few tablespoons of curd, then salt and mustard tempering is added for taste. Most people like adding green chillies, grated ginger and hing (asafoetida) to the tempering. It is in fact the hing and green chillies that give the 'picnic rice' its real taste. The reason milk is added to the rice is to prevent it from souring too much.Traditionally, curd rice is sometimes offered as prasadams in temples. Most people love curd rice as not only is it tasty, but it aides in digestion. Every family has its own way of preparing curd rice. Some add fruits like grapes, chopped apples and pomegranate seeds, others prefer just the tempering, and still others add boondhi and fried cashews. Some people, like my mother, add a tablespoon of home made dairy cream (cream collected from the surface of refrigerated boiled milk, better known as 'Pal aadai') while mixing the curd rice, to add a rich flavor... so rich, it will literally transport you to Tenth Heaven :)) and leave you stranded there! Sure thing, I can't count enough the number of times I have been to 'Snoozeland' after consuming my mother's rich curd rice with pickle for lunch. At school, at work and just about every where, the curd rice and pickle combo is sooooo tasty, especially during the hot summer months, you will sleep through any task you intend to do after eating this ;) Prepared curd rice is best eaten at room temperature, when you can just taste the mildly sour flavor of curd and the added tempering. If it is hot or too warm, you will mostly taste milk. If chilled or out of the refrigerator, it is not curd rice at all! Rather it would be frozen yogurt rice. Curd rice should never be heated or warmed in a microwave, I really don't know why, but assume that it affects the composition of the curd. Try making this very simple dish and you will love it!

Ingredients: For the rice 

Rice (Sona masoori, basmati or any variety) - 2 cups ( I use sona masoori as I find it very tasty)
Water - 4 cups
Salt - 1/4 tsps

Method: To prepare rice

1) Wash rice and drain the water. Place washed rice in a pressure cooker and add 4 cups of water. Mom always followed the 1:2 ratio of rice and water and I do the same. Sometimes if the rice is 'new' (freshly harvested rice), mom would reduce the quantity of water as the rice would over cook if too much water was added. If it was 'old rice' (a year or more old), she would add 1/2 cup extra water or allow it to soak for at least 15 minutes. If using basmati rice, wash it once and soak the rice in water for at least 20 minutes. That way you will get longer grains when the rice is cooked. I don't really prefer basmati rice for making my 'picnic rice', as I feel it doesn't bring out the real taste of curd rice. 
2) Add salt depending on your taste. Some people leave out adding salt while cooking rice. You could do the same if that's the way you prefer to. But do remember to add the salt while mixing the rice with the milk and curd. Pressure cook the rice until done. I usually cook it on high for about 2 whistles, then simmer it for about 3 minutes and switch it off. Make the rice the night before to save time, in case you wish to have it for lunch the next day or use any leftover rice. You can make curd rice out of fresh hot rice too, only it will consume more milk than the cold rice made earlier.

Ingredients: For the tempering and making curd rice

Mustard - 1 tsp
Urad dal - 1 tsp
Jeera - 1/2 tsp (I use this as my hubby loves the taste)
Chana dal - 1/2 tsp
Green chilly - 2
Ginger - 1/4 inch (finely chopped, use mango ginger if you can as it tastes even better....awesome actually!)
Asafoetida powder (Hing) - a pinch
Curry leaves - 2 or 3
Whole or 2% Milk - 1 or 1/2 liter ( I use 1/2 liter of 2 % milk and water it down further as I feel it is still a bit fatty :))
Curd - 1/2 cup
Milk cream - 2 tbsps (optional, I have never used this here in the US )
Oil - 2 tbsps
Fresh coriander leaves - a few finely chopped (optional)
Fruits (optional) - Pomegranate seeds, green grapes, chopped apples or any dry fruit of your choice

Method: To prepare the tempering and curd rice

1) Heat oil in a pan on high heat and when it becomes hot enough, add the mustard, urad dal, jeera and channa dal. Slit the green chilly or chop it finely and add it to the seasoning.
2) Next, add the finely chopped ginger, curry leaves and asafoetida powder (hing). The seasoning is ready once the mustard starts to splutter. Take care not to burn the seasoning by reducing the flame to medium heat, once the spluttering starts. This whole process should take about 1 minute.
3) Boil milk in a saucepan or heavy bottomed vessel. You can dilute it with water if you wish to reduce the fat content further :) It is better to boil the milk as cold milk will not allow the curds to sour, thus giving you only milk rice after a few hours of making curd rice.
4) Slightly mash the cooked rice with a ladle and add the cup of curd to it. You can also leave it as is, but I find that mashing it up gives a better texture to the rice and the curd mixes well with it too.
5) Add the tempering to the rice and mix it nicely. Add salt if required.
6) Now add the boiled milk and mix well. Garnish with freshly chopped coriander leaves or any fruit or your choice (preferably without seeds). 
7) Enjoy your curd rice with aam ka acchar or any veggie pickle after a few hours ! It should take less than 3 hours for the curds to sour in peak summer and about 5 hours in the winter.  

Allowing the curds to sour in milk rice :)


Note: Above recipe will serve two people for approx. two helpings.